Articles,
Design tips,
DIY Advice
How to Install Mosaic Tile | Amber
02.11.23
Welcome, DIY homeowners!
Have you chosen beautiful mosaic tiles for your home? The next step, of course, is installation. You could hire a professional, or if you’re handy, you’re probably wondering how to install mosaic tiles yourself.
You're in luck!
This guide provides an easy-to-follow, step-by-step process for installing mosaic tiles. We’ll discuss everything from the necessary materials and preparation steps to the installation process.
Let’s get started!
What Materials Do I Need To Lay Tile?
Installing mosaic tiles is like putting together a puzzle. First, you have to sort out all the pieces!
Here are the “pieces” you'll need:
1. Dust mask, safety glasses, gloves, and ear muffs for your safety.
2. Stanley knife for opening packaging and trimming materials.
3. Tile cutter for cutting and shaping tiles. You can hire one, or if you want to save money and have a steady hand, an angle grinder will do the trick!
4. Tile nippers for cutting and shaping tiles by hand. These are especially useful for making curved cuts or cutting small pieces off a tile.
5. Tiles! Ensure you have enough for your project, plus a few extras for mistakes or future repairs.
6. Tile adhesive to adhere tiles in place.
7. Bucket and mixing paddle to mix tile adhesive and grout. Be sure to thoroughly clean the bucket and paddle of all adhesive residue before mixing the grout!
8. Spacers to keep an even distance between tiles.
9. Spirit level to check the tiles are level.
10. Notch trowel to evenly spread adhesive.
11. Grout to fill the gaps between tiles.
12. Grout float to smooth grout between tiles.
13. Sealant and sealant applicator or a brush to seal the grout and tiles.
Now that you have your tools and materials ready, it's time to roll up your sleeves and prepare the surface where you’ll lay your mosaic tile masterpiece.
What Do I Need To Do To Prepare for Laying Mosaic Tile?
Skipping surface prep and rushing into tile installation can result in poor adhesion and an uneven finish.
Prep your surface following these steps for a flawless tiling finish:
1. Clean the surface. Thoroughly sweep the surface of dirt, dust, and debris. Clean off oil or grease with a detergent or degreasing agent.
2. Inspect the surface. Check for cracks and fill any with a patching compound, sanding them down once dry.
3. Level the surface. Use your spirit level to check that the surface is flat. If it’s not, you’ll need to use a floor levelling compound. Mix the compound per the manufacturer's instructions, then pour it onto the floor, spreading it with a trowel to cover any bumps or imperfections. Allow it to dry before moving on to the next step.
4. Apply primer. Primer allows the tile adhesive to bond better with the surface. Apply a layer of primer suitable for your surface (concrete, drywall, etc.) and let it dry.
Now, plan your tile layout. Mark the centre of your surface and use this point as a guide for laying your tiles. This will help you determine where to start and stop, reducing the need for excessive tile cutting.
Finally, it's a good idea to do a dry run before applying adhesive. Start at the centre and lay out your tiles on the surface to see how they fit, making any necessary adjustments.
How To Install Mosaic Tiles
Step 1: Spread the Adhesive
After mixing the adhesive according to the product’s instructions, spread a thin layer on a small surface section using a notch trowel. Start with an area around 60 x 60cm, adjusting based on your working speed and the adhesive's drying time so it stays wet as you lay the tiles.
If you’re laying mosaic floor tiles, begin in the centre and work your way to the edges.
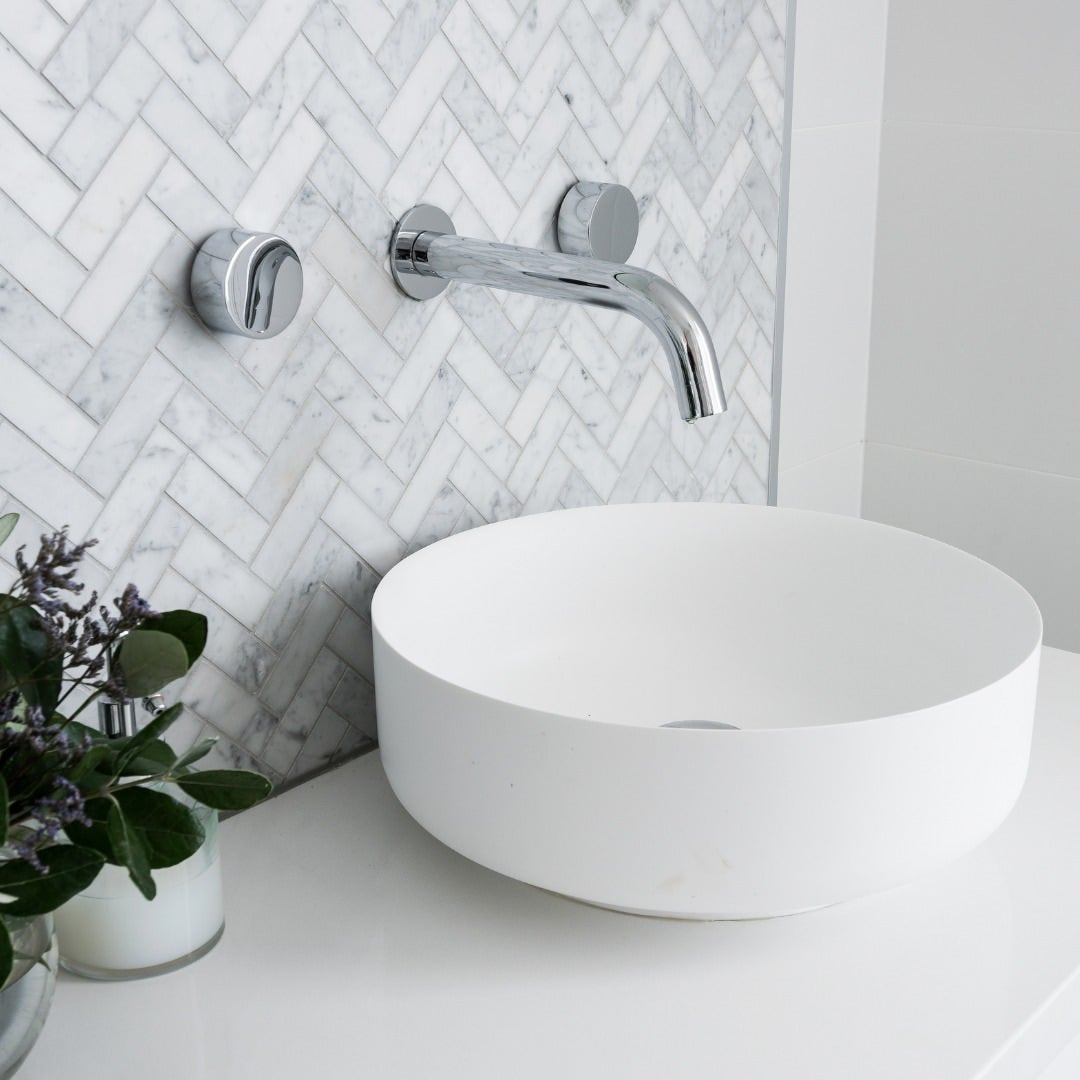
Note: How to install a mosaic tile backsplash? Wall adhesive should be more tacky to hold the tiles up against gravity. Then start laying your tiling sheets from the bottom and work your way up.
Step 2: Position the Tiles
If you're using mesh-backed sheets of mosaic tiles, position and gently but firmly press them into the adhesive. You can use a grout float to apply even pressure across the entire sheet.
Spread a thin layer of adhesive to the next small section of the surface, lay another sheet of tiles, apply adhesive to the next section, and so on. Always check that the sheeting is level and that the edges align with the next sheeting you lay.
If you’re laying individual mosaic tiles, use spacers to keep consistent gaps between the tiles.
Cut tiles for edges as needed using a tile cutter, angle grinder, or nippers.
Step 3: Make Adjustments As Needed
After laying the tiles, step back and review your work. If any tiles are crooked or sitting higher in some places, use your level and grout float to adjust them while the adhesive is still wet.
Step 4: Allow the Adhesive To Dry
The drying time can vary based on the type of adhesive and the conditions in your space. It's best to wait at least 24 hours before proceeding to the next step.
Note: If you’re using porous mosaic tiles (e.g., natural stone or unglazed ceramic/porcelain), you may need to seal them before grouting. Tile sealant will protect the tiles from absorbing moisture and stains and discolouring them. Choose a sealant suitable for your tile material and follow the product's instructions.
Step 5: Apply the Grout
After the adhesive and sealant, if applied, have thoroughly dried, remove the tile spacers. Then, mix the grout and use a grout float to spread it completely into the tile joints. After, wipe away any excess grout with a damp sponge.
Allow the grout to cure for the time specified by the manufacturer (generally 24 hours). Do not walk on a tiled floor surface or disturb wall tiles in any way during this time.
Step 6: Seal the Grout
Lastly, apply a grout sealer to protect the grout between your newly laid mosaic tiles. Unsealed tile grout easily absorbs liquids, leading to staining, discolouration, and potential mould and mildew growth.
Let the sealer dry for the time recommended on the product’s instructions, which is, again, typically 24 hours.
After this time, you can stand back and admire your tiling handiwork!

Find the Tiles You Need at Amber
Use the right tools, quality tiling products, and gorgeous mosaic tiles from Amber!
Good things come to those who wait, so trust the installation process as you patiently and carefully follow the steps in this guide.
Our team of experts is ready to help bring your tiling project to life. We’ll assist you in selecting the perfect mosaic tile and the tiling products you need, plus we'll offer handy installation tips.
Contact us by filling in the online form, or find your nearest store's location and phone number here.